Thursday, October 28, 2021

When Life Gives You Lemons

Otherwhen in its Current Full Glory
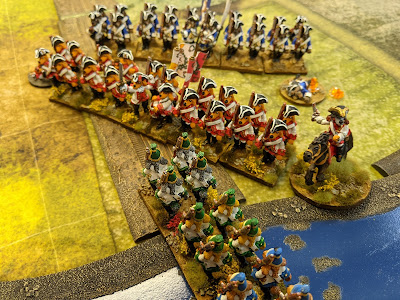
This year has tossed me several unprecedented changes one of which is having my eyes rebuilt. For the most part this is a wonderful improvement allowing me to see better than I have in over a half century, but it came with a major unforeseen issue that I can not see up close the way I have in the past, even with corrective eye wear. What this means is I must relearn how to paint. Complicated figures or painting patterns are outside my skills for now, so I went back to the simplest figures I had to recover with, these being my Toy Soldiers.
New 12 Figure Otherwhen Unit in Line
Having made this decision there are two unexpected effects with which I am now dealing. First is this painting will increase my “Collection.” I chose this word deliberately as I discovered that my formally “Practical” force, which being enough figures to play normal size games I host, was going to become larger purely for my own gratification, thus changing from being just gaming to collecting. The second was if I want to ever use this many figures in games, I needed to simplify the rules I use. Neither of these is a bad thing, but both require me rethink goals.
New Otherwhen 12 Figure Unit in Column
Organization: I am now looking at going from games of three to four players per side to ultimately nine players per side. The new organization for this is going to be in steps, the beginning being to switch brigades from four regiments down to only three, then adding a Light Cavalry Brigade of six squadrons of lancers and hussars and rearranging where artillery was allocated. This would bring me to three full infantry brigades and a light and heavy cavalry brigade along with Corp artillery for six players per side.The full future expansion was to bring all six infantry brigades up to four regiments of infantry and a battery of artillery, with each division adding a light cavalry squadron. A Light Cavalry Brigade of four squadrons, which would go from six figures to twelve and a Heavy Cavalry Brigade of six squadrons. Both cavalry brigades would also be gaining a Flying Battery of horse artillery. The Corp Reserve would go to three batteries of heavy artillery and two flying batteries of horse artillery. Commanders would increase to ten with six infantry, two cavalry, a Corp artillery, and a Commander-in-Chief.
Nodd 3 Regiment Brigade With Artillery and Hussars
Rules: These need combat simplification and command restructuring. Combat will likely combine with morale something like Command and Colors systems, while command will likely change to limited unit activation per turn with players still having a reserve order pool to improve results. C-in-Cs will likely add command improvement cards that they can assign or hold to implement themselves. I have many general thought but few actual rules right now. Critical to my thinking is that players will still be able to do more rather than less as I retain my view of game design being that players want to be rewarded, not penalized in their game play.
Otherwhen 3 Regiment Brigade With Artillery and Lancers
New Nodd Division
New Otherwhen Division

Friday, September 24, 2021

Mid Nineteenth Century Campaign - A Beginning

Part of the Hildorien Maethor Army 

 Early in the Spring I decided to run a campaign for my local game group. The goals were simple tactical rules and small force to have games conclude in 2-3 hours, area point-to-point movement and well defined objectives for the map part. Previous control of an area and the movement into that area would determine the type of battle based on cross referencing each armies posture. This would give a short time spent on map moves and focus the game on the tactical level. 

Flag of the Principalities of Mutts
I have eleven players for the game and while it is an ImaginNation setting I wanted it to feel like the historic period. I therefore have 3 major nations, each run by two players, to represent the powers of Austria, France and Prussia. There are two players directly opposed to each other that represent Italy. The remainder are all independent. The general goals are for Austria or Prussia to build and run the German state, while France seeks to prevent this. The Italians are looking for a single unified state and remain independent from the big three powers. For the independents the goals range from being on the winning side of Greater German and having a voice in its future, or retaining their independence from all other states. There are plenty of neutral/small states on the map to conquer, or control to allow the smaller states to negotiate terms with the larger ones. These will simple require occupation to obtain control. 

Flag of Hildorien Maethor
An unusual feature of the campaign is ending it in phases based on the total loses of all nations. I want to represent the short duration of most of the wars and I felt this would accomplish that and make players more aggressive. Once the loss limit is reached all controlled territory can be traded, and all armies will return to their starting levels for the start of the next phase. 

Flag of Lupuslignum
Each player begins the game with two full armies and a half strength one that is used to replace loses in the main two. The initial size of each army is based on its type, of which there are four different ones, Aristocratic: cavalry heavy, Educated: artillery heavy, Quality of Quantity: large but an abundance of green troops, and Small but Elite: having no green troops, the largest amount of veterans, but the least numerous. The tactical rules are base on Bob Cordey's Portable Wargame with a number of tweaks of my own. 

I will provide more details on rules in future posts. 


Thursday, September 23, 2021

Back From the Dead...Kind of

19th Century ImagiNation Army


 After nine month of fighting with it I have finally convinced Google that this is indeed my account.

So what have I been up to these past months? I just returned from Gen Con and what a strange show it was. I don't think I have seen this level of attendance in over 25 years. Still waiting on official numbers but my estimate is 20,000 per day and 25,000 unique. That's way down from the 60,000-65,000 of 2019. Despite that, it was a good show. I especially enjoyed seeing old friends again.

The rest of the year was work, personal issues and some gaming. The biggest part is working to start up a Mid Nineteenth Century Unification Wars Campaign. I have the tactical rules done, a good deal of the campaign rules and a few of the armies complete. Now that my schedule is open again progress should move quickly. More detailed reports will follow soon.

Detail View of Line Unit

Monday, December 14, 2020

The Battle of Three Fords


With their key river defense line broken the Union of Pacts Commonwealth had begun pulling back the rest of their river covering forces and supplies to safer interior lines. The Wolfenstein Empire had sent out small probing forces to harass these operations. It was in the area of Glenview and Prospect Heights that these forces collided.

The main Commonwealth forces concentrated on a hill west of the Planes river and south of the main wooded area that guarded one of the fords and the main road leading west. A detachment of light infantry was positioned in the woods atop the high ground, while in the open fields beyond awaited the forces cavalry and their supply wagons. They needed to get the supply wagons off the west side of the main road and keep their force mostly intact.


The Empire had sent a flanking force into the main woods, consisting of a small detachment of light infantry, and supported by a large dragoon regiment. There advance guard was a line battalion and a cuirassier regiment coming in on the east side of the Planes River along the main road. This was followed by the main body of line infantry, their converged grenadier, and a battery of artillery.

The Empire started the battle by forcing the road ford with their cuirassier while their line infantry struggled to follow up as quickly as possible. The main Union forces quickly responded by rushing their infantry down from the hill to block the way across the ford. Accurate fire reduced the cuirassier who launched a desperate charge at poor odds. This was sent routing away with little results showing for their effort. It did buy time for their supporting infantry to cross the river. Meanwhile the main force struggled to get forward and bring the artillery in to action.

In the forest the Union light infantry held their superior position as the Empire forces moved forward. Their well timed fire forced the Empire back to regroup time and again, and eventually routed the Empires lights. With their cavalry in the lead the Union successfully crossed the central ford and was easily moving the wagons out of harms way.


Back at the main road the Empire with the aid of their artillery had finally forced a crossing of the Plains River ford, but this seemed too little, to late. The Union had successfully started to withdraw their light infantry from the woods, and their line infantry away from the growing Empire force on the main road. They had effectively established a second line of cavalry to cover the withdraw, when suddenly they changed their minds and instead launched a massive assault against the pursuing Empire troops. Outnumbered, out classed, and out maneuvered, this became an immediate disaster for the Union. In a moments time their brilliantly executed saving of their supplies and preservation of their force turn to the routing of their force and an unexpected defeat.


Tuesday, May 5, 2020

RIVER ASSAULT AT HALF DAY ROAD

Assault on the North Bridge
In April, the Wolfenstein Empire had been held in check at capturing a river crossing into the Union of Pacts of the Commonwealth. Throughout the following months, several minor probing attacks had been going on, but no major attacks had occurred. Both sides used the time to recruit, drill and bring their forces up to a full war footing. In mid-June, the next major thrust came.

All along the Planes River, the Union maintained garrison and lookout posts. Maintaining forces back, allowed them to reinforce anywhere along the front that came under attack. The Empire had been feinting south near the town and crossing of The Planes, while planning a more daring and unexpected attack far to the north.

In the early hours, the garrison at the twin bridges along Half Day Road were startled when their scouts reported a major Empire force heading their way. General Growling immediately sent word to his relief forces to “Come a running”. He sent his only troops, the Houndstooth’s Battalion, to the east side of the north bridge, while the Buffalo Grove battery took up position to cover both bridges approaches.
Houndstooth's Battalion at the North Bridge
At nine o’clock the Empire forces began to arrive, led by their cavalry followed by columns of infantry. By that time, the Union’s light infantry scouts had returned and were formed up to cover the southern bridge. The Empire cavalry moved up to pin the Union forces in place, holding just outside musket range while the remainder of their forces arrived on the field and began maneuvering to assault both bridges in unison. Union artillery kept up a lively barrage, disrupting the Empire’s approach.
Buffalo Grove Battery in Action
By mid-afternoon when the Empire forces had finally moved into position to start their attacks in earnest, Union reinforcements of all arms, including their grenadiers had arrived on the field. It seemed the Empire’s vast numerical advantage had been squandered by not attacking rapidly in the morning.
Battle Rages Around the South Bridge
Throughout the rest of the afternoon, the Empire launched continuous assaults against the north bridge. While none directly succeeded, they did wear down the Union forces. The key moment was when both side’s grenadiers met in an epic clash, resulting in both forces being routed. This left the Union without any reserves, while the Empire simply pushed forward with yet another unit of line.  
On the south side, the Empire chose the different tactic of massing their firepower and shooting down the defenders. When one of their battalions was reduced, they brought forward another. Meanwhile, on the Union side, every time a battalion was lost there was no replacement.
Opposing Grenadiers Fight for Control of the North Bridge 
As the sun began to set, it looked like, though beaten and bloody, the Union would hold the crossing. However, with a final Herculean push, the Empire threw everything it had remaining on a final assault. Breaking another Union Battalion left them shattered, forcing the brave defenders off the field and leaving the crossing in the Empire’s hands. 


The Late Afternoon Fighting

THE HONORED DEAD


In my games each time a unit has been routed in a game I permanently note it by placing a group of red poppies on the back of one of the bases. If it has performed some heroic action, I note that with a purple flower. This provides a quick visual reference of the past performance of units. Rather than being disappointed by a group’s loss, I think of it as showing their metal by performing their duty and are deserving of memorialization.  
The Honored Dead From the Half Day Road Battle

The Empire Lord Saluki's Hussars, Shepardton's Lights, and Converged Grenadier

Union Artillery, Softpad's Dragoon, Houndtooth's, Wolfingham's and Whinestein's Line Infantry, Converged Grenadiers

Wednesday, April 22, 2020

THE BATTLE OF WILLOW ROAD BRIDGE


The Setting

After a score of years with their grievances to high  taxes, unfair trade policies, lack of true representation in the Imperial Council, and inequality under the laws, the Union of the Packs of the Commonwealth regions had had enough. In the winter of 1761, they declared independence from the Wolfenstein Empire. Everyone knew the Empire would attempt to bring the rebels back into the fold--by force if necessary--but would have to wait for good weather.

The Union knew there were too many bridges across the Plains River to be able to guard them all, so set about destroying the places it could not control. The Willow Road Bridge was one of these, and while the Union did not expect any opposition, prudence dictated sending an armed escort.

The Empire had spent the winter scouting for the best invasion points into the Union. Some, like the city of The Plains were going to be heavily defended, so finding an undefended crossing point to launch a flanking maneuver was decided on. Willow Road provided a good network to travel on and the bridge across the Plains River was wide and strong enough to handle the largest, heaviest artillery and wagons. It was decided to send a reconnaissance in force to capture the bridge in preparation of the main forces crossing. 
The Battle Field Looking West at the Top


The Union General Baysmoon had started his force off just before dawn. On arriving at the objective around seven in the morning, his engineer informed him that it would take his group about five hours to prepare the bridge for destruction. Baysmoon set them immediately onto their task while he went off to the local tavern to have breakfast, leaving his second in command, General Hunter to oversee the troops in his absence. Returning just after nine, he noticed a cloud of dust on the horizon. General Hunter, who had been observing the same dust from atop the nearby hill, quickly road down to his commander. “It would seem we are in for a show today. What are your orders Sir?”

With the enemy approaching, the Union forces cross the bridge to take up a defensive position on the hills to the east and form a blocking force across the main road.
Union Forces Headed to the East


Seeing the unexpected enemy in their defensive positions, Imperial General Sir Arfer sends his cavalry to both flanks while his infantry begins arriving along the road. Knowing time is critical, he launches his cavalry on the attack--not waiting for his infantry support--expecting that his quality and weight of numbers will carry them to victory. The outcome is not what he expected. Both sides’ battle cavalry force their opponents to retreat, while the Union’s Spitz’s Hussars easily defeat Lord Saluki’s Hussars. Their success is short lived as the Hussar’s lively charge carries them into the fire of the Empires light infantry causing Spitz;s forces to retreat.


Empire's Lord Pawling's Cuirassier Clash with the Union Snifferbutt's Dragoons


Light Cavalry Clash. Once Old Friend Meet in Combat for the First Time. 
Spitz's Hussars on the Left, Empire's Saluki's the Right
However indecisive the cavalry battle, it buys time for the Empire’s infantry to deploy and begin the general advance. A fire fight erupts across the whole line and the Union finds itself needing to give ground to prevent the battle line being flanked. The slow progress allows both sides’ cavalry to recover and reenter the fight. This time the Union’s Snifferbutt’s Dragoon rout the Empire’s Beggin’s Dragoon. This allowed them to make the significant contribution to the infantry assault that otherwise would have left the Union’s last line infantry alone against three opponents. 
Empire Shepardton's Lights Skirmishing with the Union Battle Line


With the Union forces pressed against the river, the Empire launched the decisive assault across the entire line. Victory would see them capture the bridge, but it was not yet to be. Both sides’ infantry were routed while Snifferbutt’s dragoons were victorious. The Empire still had one more trick in its bag. Launching the recovered Lord Pawling’s Cuirassier into a charge, with the support of the Shepardton’s Light Infantry, they routed the dragoon’s but were themselves routed. This removed all Union opposition from the east side of the bridge with most of the Union forces in a near state of collapse. During this whole time, the Union engineers had been working. Even with all the coming and going, through their Herculean effort the bridge had been mined. The fuse was lit, it burned, then sputtered, when suddenly, just as the Pawling’s Light Infantry neared the bridge, it exploded in a spectacular display. Miraculously all the Union troops had made it back west of the river before the bridge’s destruction. Tired and worn, the Union forces made a hasty withdrawal as the Empire troops could only watch.
The Empire's Assault. Out Numbering the Enemy 2-to-1 What Could go Wrong?


The Infantry on Both Side Retreating. Odds are Still in the Empires Favor


All the Union Forces Retreated to the West the Shepardton Lights Watch as the Bridge Over the Plains River Explodes. 
Observations

The game went well as most of the time my opinion kept shifting as to which side I felt had the upper hand. The Empire took the maximum time to reach the battlefield. They were hindered by a few low activity turns, yet they came within a moment of winning the game. The Union cavalry are the heroes of the day, especially Colonel Snifferbutt’s Dragoons. At every critical moment, the cavalry force rose to the occasion. Getting Admirable command results, allowed them to make double moves to get to critical positions and fight well above the average.

Overall, it was a close game with both armies being just short of the breaking point. I really thought I had myself handily beat a couple of times, only to see critical reversals take place. The next battle will be the Crossing Point.